[separator headline=”h3″ title=”Knowledge Base”]
[toggle title=”Support Options” open=”false” icon=”star”]
Congratulations!
Your website is now completed, up and running. Be sure to put your website address on your business cards, tell your friends and family, and share the love!
But now that your website is up, what if you need to update some information? Put up a newer picture or video? How about putting up a new blog post? Make Tech Better, Inc. is here to help you in a way that meets your needs and your budget.
MTB Webmaster ($400/month)
With MTB as your Webmaster, you can always be sure that your website stays up-to-date as well as safe and secure. With MTB Webmaster, we will:
- Meet with you one hour a month to gather your new and/or edited content (text, photos, videos) and discuss any other minor changes to your site, as well as answer any questions about how to better use your website
- Spend two hours a month updating your website’s content
- Spend one hour a month updating your website’s software and security measures and back-up your site for safe keeping
- If you need further support, you can purchase one hour blocks at $100/hour (less than our On-Demand rate!)
MTB On-Demand ($125/hour)
For clients who anticipate fewer changes per month, this is a great option. Simply contact MTB and make an appointment (one hour min.) so you can:
- Update your content (text, photos, videos)
- Receive additional technical training on how to use your site
- Schedule maintenance and back-ups to your website’s technology
A word about hosting
- All sites hosted with MTB’s Website Hosting services include as a part of each of the above services inspecting and troubleshooting the hosting services
- If your website is hosted on your own server or a third-party server, MTB cannot offer any support for server-side difficulty; you will have to be in touch with your server company for further support
[/toggle]
[toggle title=”How to log-in to my website” open=”false” icon=”star”]
In order for you to make edits and post new content to your website, you will need to be logged-in to your site. Follow these simple instructions so you can get started, then visit other areas of the Knowledge Base to learn how to make your changes.
1) Go to the log-in page address you were provided by MTB. You will see something like this:
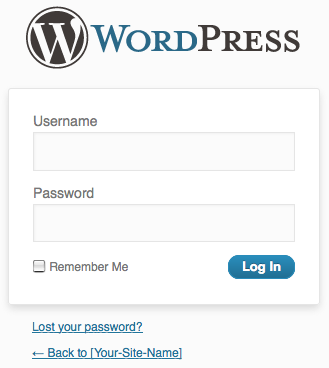
A generic login form
2) Enter your username and password you were provided by MTB. It is super-important that you not share this information with anyone as they will have access to your website!
3) You may have to do a simple math problem in addition to entering your name and password. This is a security measure. Now click “Log in.”
That’s it! Now that you’re in, explore the Knowledge Base further to learn how to edit your site yourself!
[/toggle]
[toggle title=”Learn about the Dashboard” open=”false” icon=”th-list”]
Now that you’re logged in, let’s take a brief tour around the “dashboard” of your website so you know what you can do (and sometimes what you shouldn’t do!)
The Dashboard is where you will be able to access your Pages, your Posts, and your Media.
A “Page” is a website page–it is a static page that will, in all likelihood not need to be updated on a regular basis.
A “Post” is a blog entry–a page which will have its posting date published. It’s more for pushing news and recent information out to your readers. You only need to concern yourself with posts if you have a blog.
“Media” is where your photos will live.
Your Dashboard will look something like this:
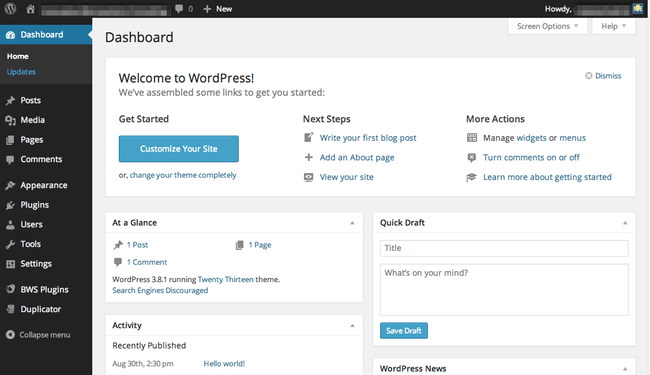
Some dashboards will very from website to website, so don’t worry if yours doesn’t look exactly like this.
You will want to concern yourself with the “Pages,” “Posts,” and “Media” tabs only. Although you will have limited access to other areas of your website’s dashboard, it’s best to stick with the simple editing. Explore the Knowledge Base further to learn how to now edit your Pages, Posts, and Media.
[/toggle]
[toggle title=”Edit a page on your website” open=”false” icon=”home”]
Now let’s explain how to navigate to a particular page on your website in order to edit its contents.
From the dashboard, find the tab that says “Pages.” Click on it and you will see a list of your present pages. Find the name of the page you wish to edit and click on it, opening your page. (Important: Do not create a new page without consulting with MTB, as your menu will need to be edited to accommodate new pages. It’s better to simply edit the pages you already have!).
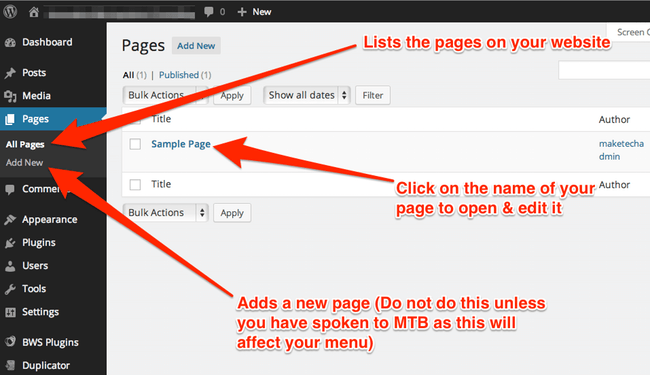
How to find and edit your pages
Once you have selected your page, you will see something that looks like this:
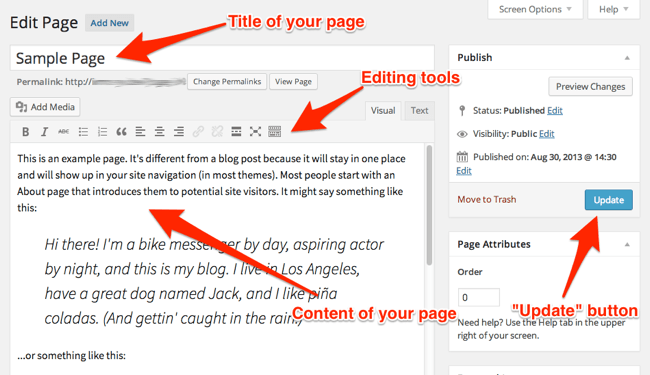
Your Page Overview
You can change the name of your page if you wish. If you do, be sure to hit the “edit” button underneath the title by the word “permalink” and change the link to the page. Be sure to exclude spaces or special characters if you do this.
The content of your page can be edited almost just like a word processor. Select a starting point and begin typing. Change the formatting of your paragraph text by highlighting it and hitting the “bold” or “italics” buttons for further modifications.
If you have titles of sections, you can select the text and in your editing tools you will see a “drop down menu” which says “Paragraph.” You can then change the formatting to be “Heading 1,” “Heading 2,” etc. “Heading 1″ is the largest and should be reserved for the titles of major sections.
When you are done editing your text, be sure to hit the “Update” button on the right hand side, otherwise your changes will not go into effect.
Refer to the Knowledge Base to learn how to upload and insert media like photos.
[/toggle]
[toggle title=”How to insert photos” open=”false” icon=”camera”]
To add a photo to a website page:
Follow the directions above to navigate to the page on which you want a photo. Once you are on that page, put your cursor at the beginning or the very end of the paragraph where you want the photo to appear. It looks really when the photo is left or right justified with a “word wrap” instead of floating in the middle.
The following pictures will walk you through the steps:
[separator headline=”h5″ title=”1) Put your cursor at the insertion point”]
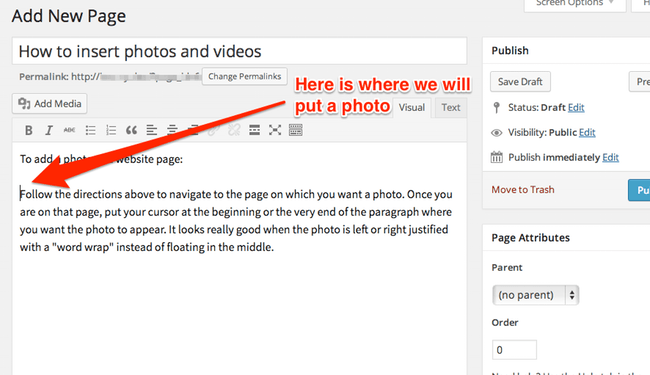
The insertion point
[separator headline=”h5″ title=”2) Press the ‘Add Media’ button”]
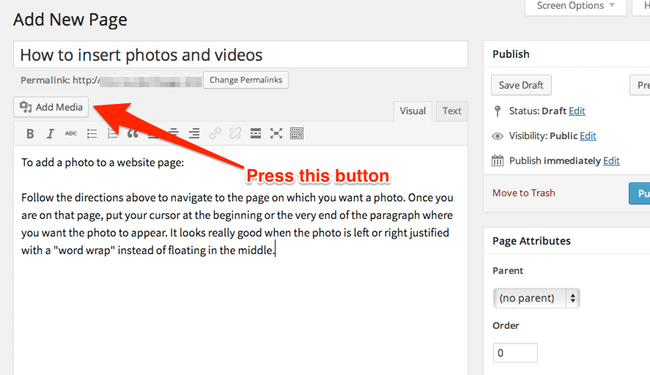
The “Add Media” button
[separator headline=”h5″ title=”3) Select your media (in this case, a photo)”]
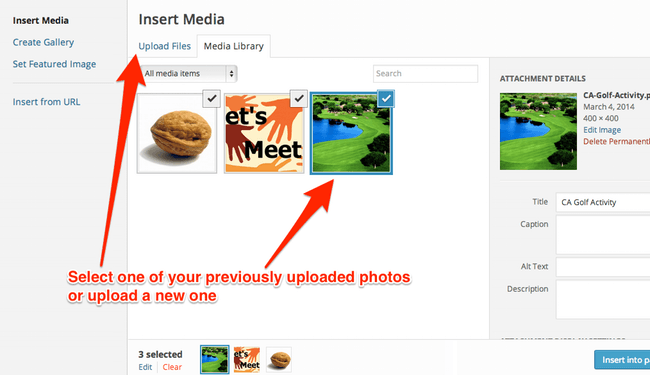
Select your media
[separator headline=”h5″ title=”4) Enter a title, caption, and Alt Title”]
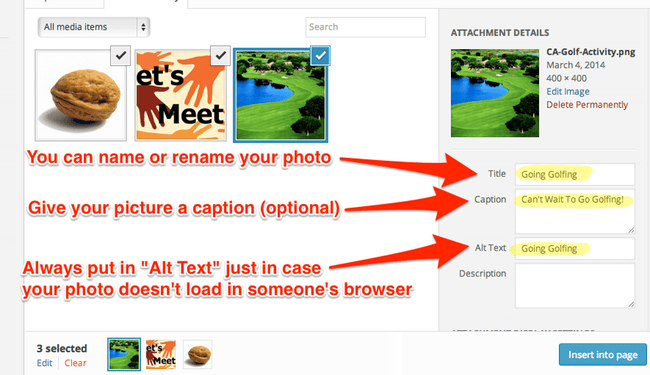
Title and caption your picture
[separator headline=”h5″ title=”5) Select your alignment and size”]
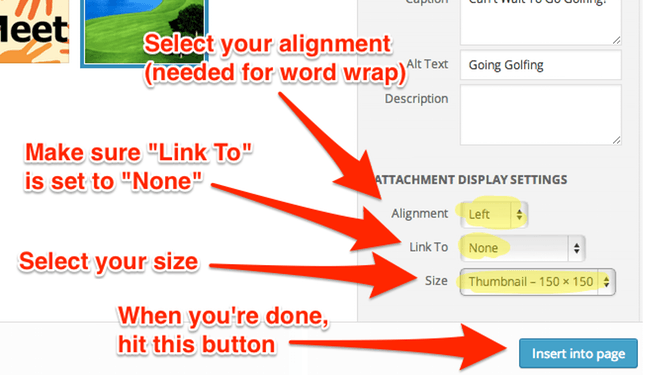
Select alignment and size
[separator headline=”h5″ title=”6) You’re almost done”]
Almost done
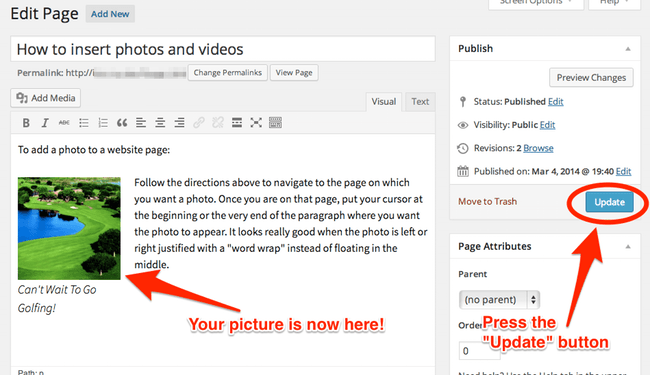
[separator headline=”h5″ title=”7) Your finished result”]
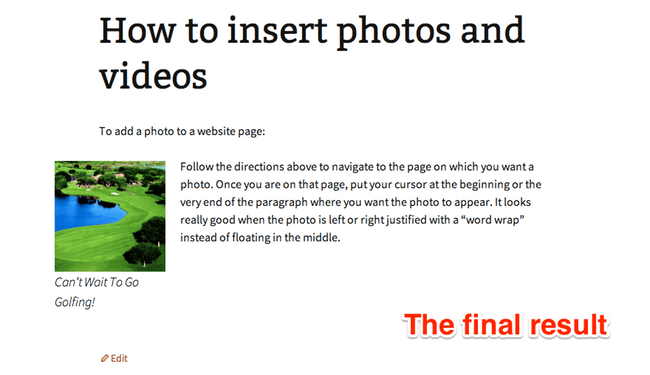
The finished result
[/toggle]
[toggle title=”How to insert YouTube videos” open=”false” icon=”film”]
To add a YouTube video to a website page:
[separator headline=”h5″ title=”1) Go to the page of your YouTube video.”]
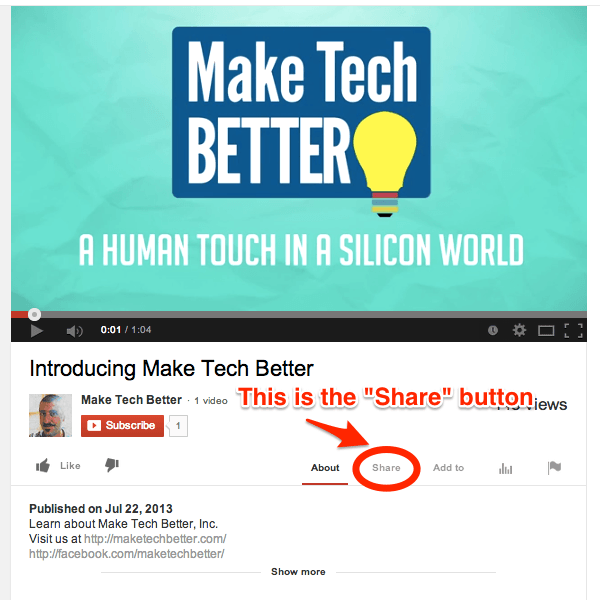
[separator headline=”h5″ title=”2) Locate the ‘Share’ button.”]
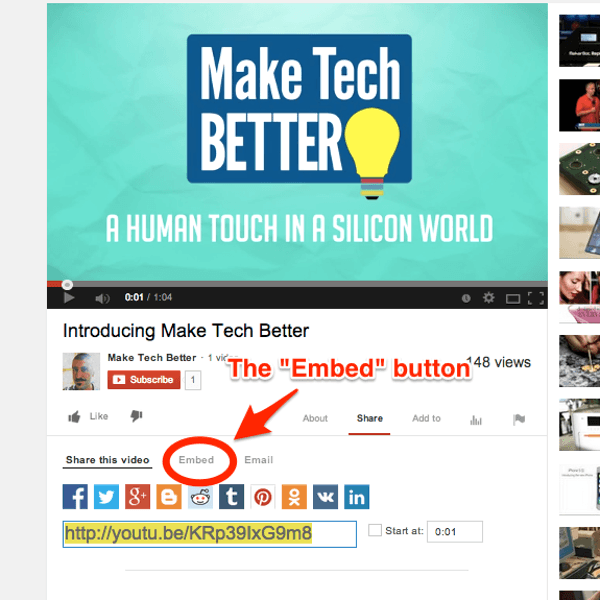
[separator headline=”h5″ title=”3) Locate the ‘Embed’ button.”]
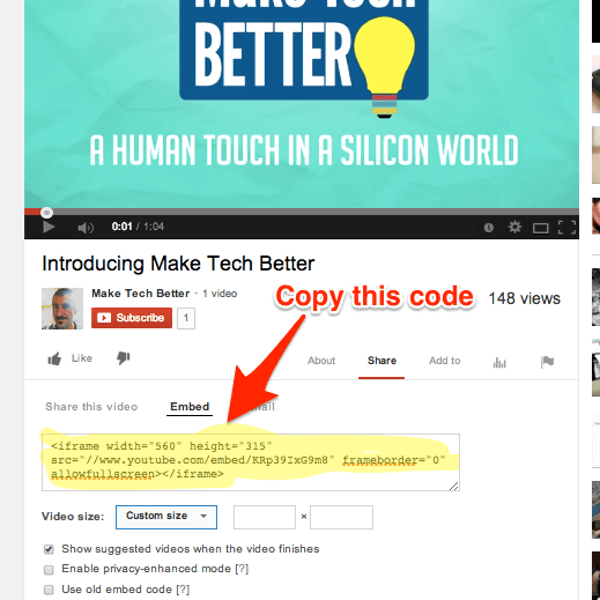
[separator headline=”h5″ title=”4) Find and copy your code.”]
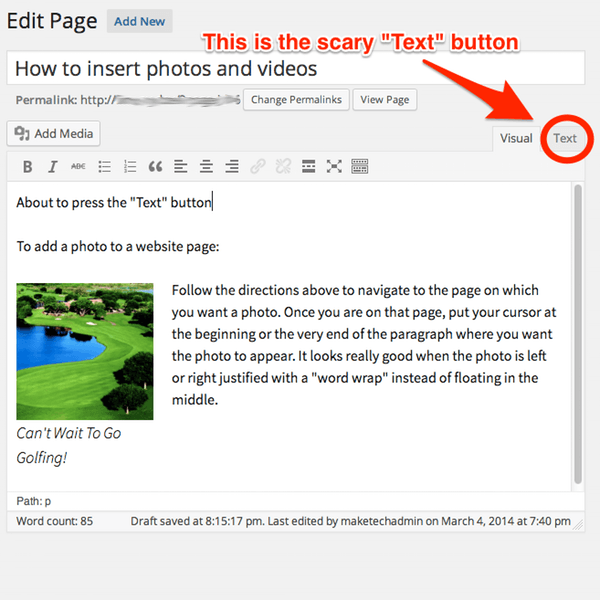
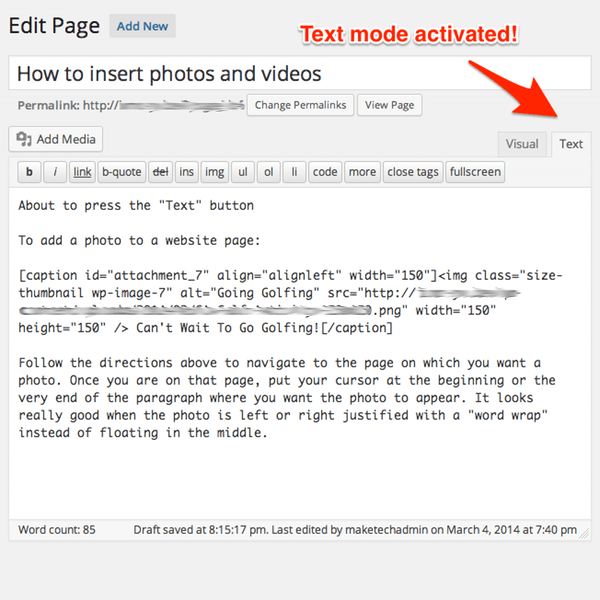
[separator headline=”h5″ title=”5) Return to your page and find the ‘Text’ button.”]
This might be a little scary. Don’t worry.
[separator headline=”h5″ title=”6) This is the Text view. Find the place where you want your video to go.”]
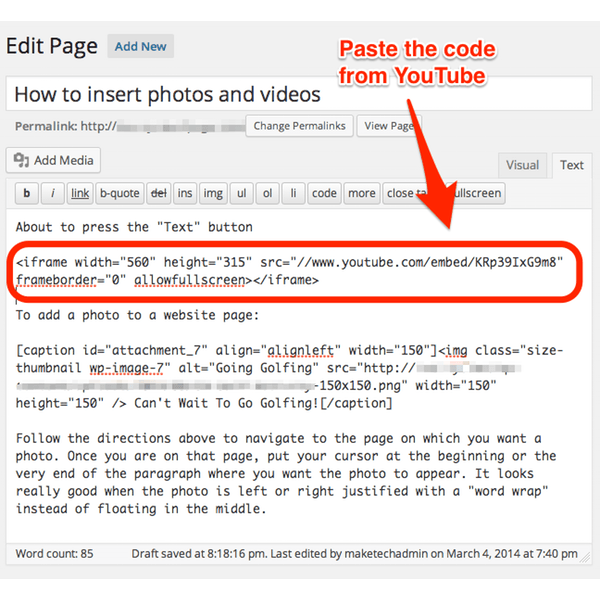
[separator headline=”h5″ title=”7) Paste your code where you want the video to appear.”]
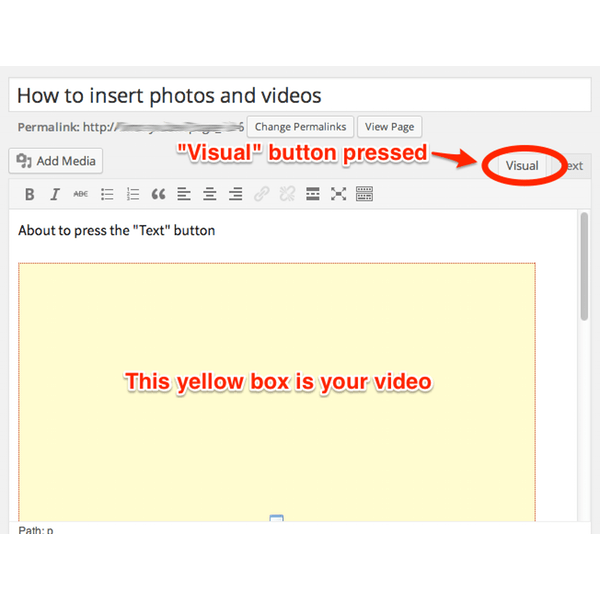
[separator headline=”h5″ title=”8) Go back to ‘Visual’ mode.”]
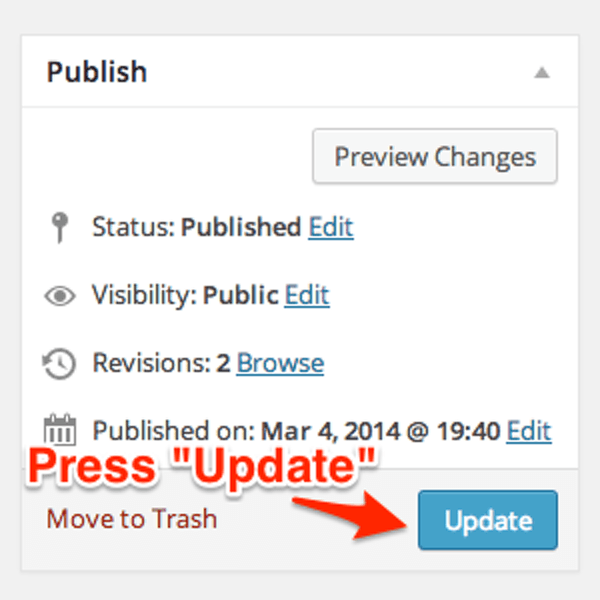
[separator headline=”h5″ title=”9) Press the ‘Update’ button.”]
[separator headline=”h5″ title=”10) The final result.”]
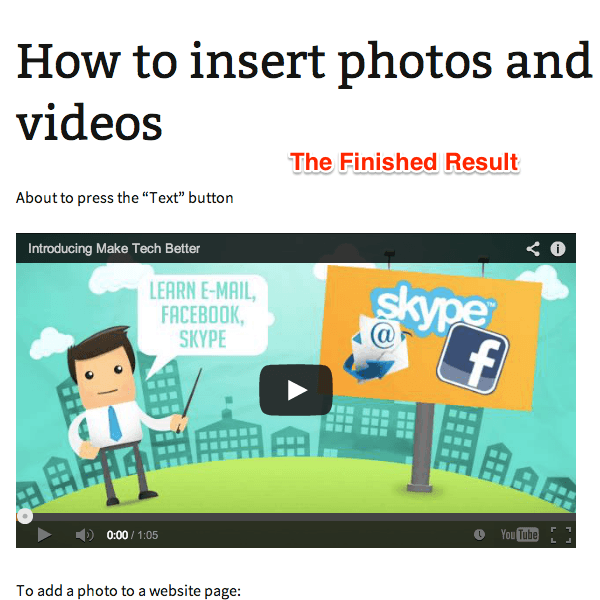
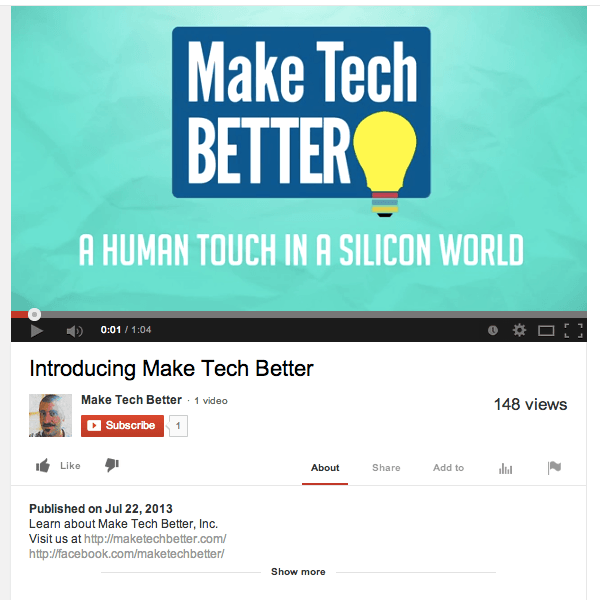
This is what an embedded video looks like live:
[/toggle]